Food Photography 101: Props and Styling
Props:
Props are one of the most fun things about photography I think. I could spend hours in a store looking at fun plates, glasses, utensils, napkins, etc.. Unfortunately, my tiny kitchen doesn’t have a lot of room for extra props and I don’t have the space to put up shelving so I try to keep my collection to the basics.
Backgrounds: I am going to talk about backgrounds first and then we will work our way up with the more fun stuff. As you probably have noticed, I have a number of different wooden backgrounds that I use.

I made these backgrounds myself. I went to a hardware store and hit up the lumber section and found hobby boards. I bought some in light colors along with different colors of paint. I’m not going to do a tutorial of how to make these here, but if you guys want me to, let me know and I will post one another time. Here are a couple of tutorials from Table For Two and Running to the Kitchen. I did not use tongue and groove boards as they did so as you can see, there are a few ways to make these. My turquoise and white board are double-sided. I would say it cost me about $20-$40 for materials. I made so these are not too expensive to make and by making your own, you can customize the size.
I also use this marble pastry board from Sur La Table as seen here:

I will also occasionally use the dark brown surface of my dining table as is. You can also utilize fabrics as backgrounds which you can get for cheap at a fabric store. Get creative!
Props:
When it comes to choosing props, I follow two general rules:
1. When choosing props, you want to pick items that will compliment your food, not distract from it!
Though it will depend on what you make, I typically avoid plates and bowls with busy patterns. I want my food to shine, not the props!
2. When it comes to props, the smaller and shorter, the better!
I have found that when using larger bowls, plates, or glasses, I often have difficulty framing my photos. It is much easier to use serving pieces that are smaller in size because they are easier to frame. In addition, when you use a regular-sized dinner plate, it often means that you have to use more food to fill it. Thus, I use salad plates and appetizer plates for my photography.
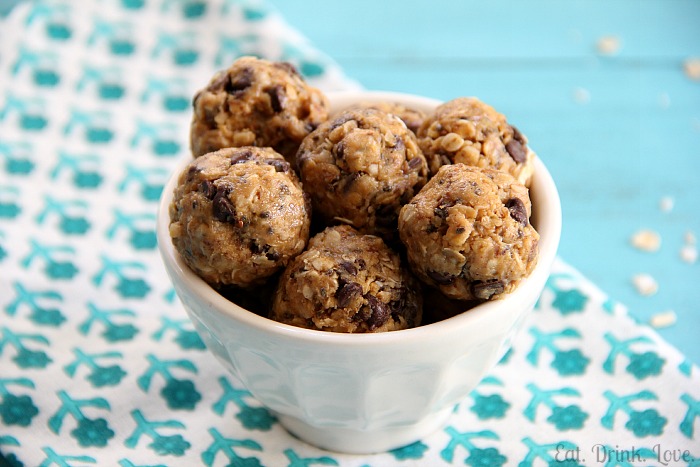
The same is true when using bowls. I don’t want to see your bowl (as cute as it may be), I want to see what is inside of the bowl. I’m a big fan of these mini latte bowls from Anthropologie. I think if you go to the store, you can buy them individually and they come in lots of colors.
Here is a example: 
Let’s talk about drinks for a few minutes. When photographing drinks, I like to use shorter glasses. This is mainly because it’s difficult to frame photos when using a tall glass or a glass with a stem. Think about it, when you set up a shot, you typically aren’t just taking a photo of a glass, you’ve probably styled it, maybe threw some fruit in if you used it in the drink, a pretty napkin, some straws, etc.. When you use a tall glass, it forces you to pull your camera up to capture what is in the glass and thus you lose all that styling you set up. Let me show you some of my drink photos:
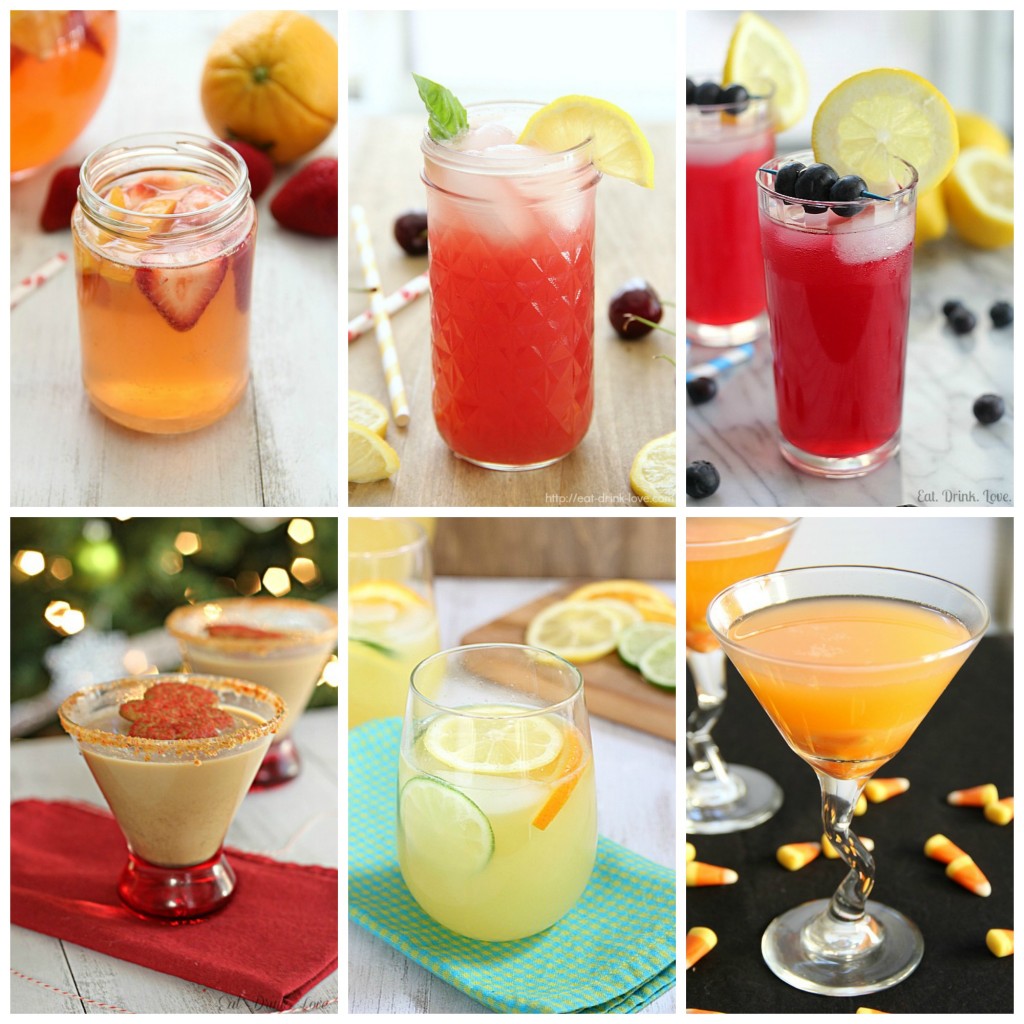
If you look at the top row, you can see I like to use mason jars for drinks. That middle photo was actually once a jar of local honey. After I finished it, I washed it out and it’s now a prop for drinks and sauces! For the lemonade in the top right corner, that is actually just a taller juice glass. On the bottom row, you’ll see a martini glass without a stem and a wine glass without a stem. I used them because they are easier for me to photograph. However, I did use a regular martini glass for my candy corn martini, so it really depends on the drink and how I want to style it, but in general, I favor smaller and shorter glasses.
Styling:
Ok, styling. Styling is not something that comes easy to me. There are so many times where I just have no idea how I want to style my photos. First and foremost, when you are choosing what to style your photos with, you want to choose items that make sense. I like to style my photos using ingredients that I used in the recipes. If you look through my photos, this is pretty evident. I like to do this because sometimes it is not always obvious when you look at a photo what is in the recipe. I also like to use ingredients that I use for garnishing in my styling. Plus, I love the look of fruit and citrus or bright green herbs in my photos. It makes the recipe look nice and fresh.
Make sure if you are using greens or herbs that they are fresh and not wilted. If you are shooting something with a sauce over it like my lasgana rollups, you don’t want to completely cover the food so you can’t see what is under the sauce. I wanted to show off what was inside the lasagna rolls and covering them completely in sauce would make that difficult.

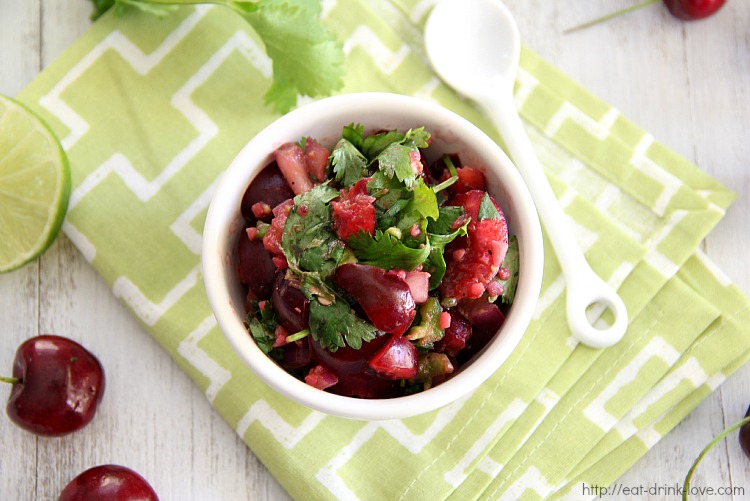
When you are considering what color dish or bowl to use, first think about the color of the food you are photographing. Though I tend to favor white dishes, sometimes white is not the best choice, this is particularly true if you are photographing a recipe that is a light or white color.
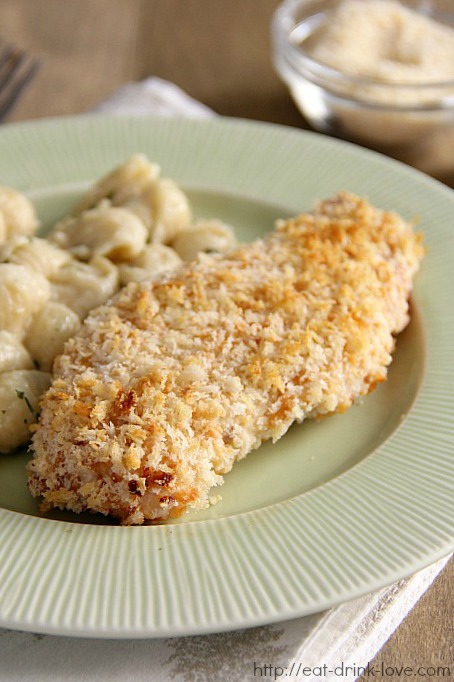

In both of the above photos, using a white dish or bowl wouldn’t work well. The chicken is lighter and so I used a light green salad plate instead of plain white. For the pasta, I used a green mini bowl instead of a white one. I also went with a red bowl for the macaroni salad I posted earlier in the post. Napkins and fabrics are a great way to add color to your photos. In the example below, you can see a photo of chili with and without a napkin:

When I first started taking these, I didn’t use a napkin and I thought I needed something to break up the brown so I added a light yellow napkin. Not only does it add a little more color, but it also adds some texture. Sometimes I like to use napkins with busier patterns to add some life to my photos:
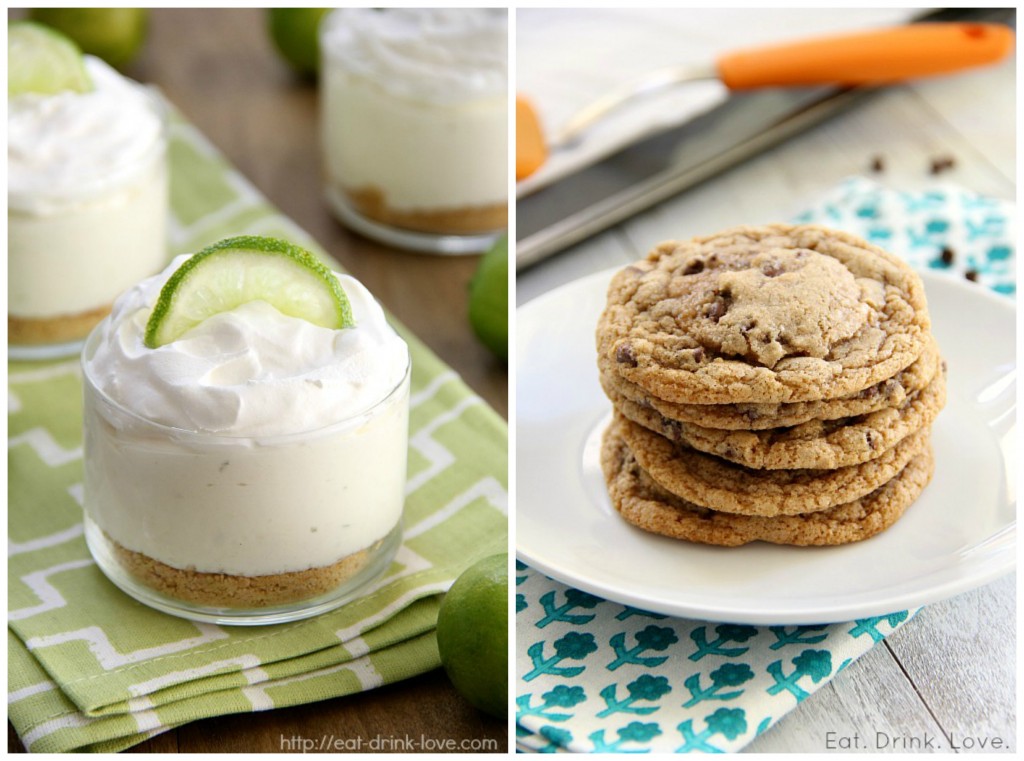
My little no-bake key lime cheesecakes are cute on their own, but they don’t have a lot of color on their own so I used a light green napkin with a fun pattern. Obviously, the green makes sense since the recipe uses limes. In the cookie photo, it’s the same issue, on it’s own, it’s just brown cookies and a white background so the napkin adds a nice pop of color. Aside from napkins, you can also add fun touches with other materials:

When photographing baked goods, I sometimes like to add in some colorful baker’s twine. For the ice cream, I bought those fun paper ice cream bowls. I bought the mini cake stand at Homegoods last year. It’s a good size and I can change out the ribbon as needed. Like I said, use items that fit with the theme of the recipe you are photographing. If you are shooting some pancakes, maybe include a glass of orange juice or a cup of coffee. If you are shooting cookies, maybe stick in a glass of milk. For drinks, I like to use fun paper straws.
Setting Up your Shots:
The Rule of Thirds: The Rule of Thirds is one of the biggest “rules” in photography in terms of setting up your shots. Basically if you were to take a photo and divide it into thirds both horizontally and vertically, the center square should be the main focus of your photo.
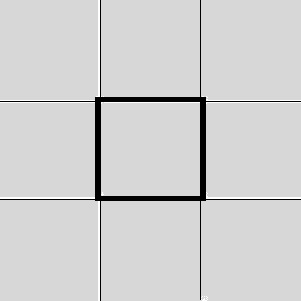
Another part of this rule is that no square should be left empty. So while you may have your recipe front and center, you can use other props so that there aren’t sections of your photo that are left untouched. I would say that The Rule of Thirds is not really a rule, but more like a guideline. I break the rule often, but it’s generally a good rule to follow if you are still trying to figure things out. I tend to like shots where I am at a 75 degree angle (as you can see in photos I included in this post). I will sometimes opt for overhead shots, but I don’t do this as often. In terms of layout, I tend to favor portrait (vertical) over landscape (horizontal).
One other thing I thought I would note is that if you are planning on submitting a photo to FoodGawker or Tastespotting, you will want to make sure that you take some photos that can be cropped into a square. Sometimes this means I have to back up, but get in the habit of thinking about it while you are shooting so you do not forget.
Where to Buy Props:
Peir 1
Anthropologie
West Elm
Crate and Barrel
Target
Antique stores, garage sales, etc.
Bake It Pretty
Michaeks
The TomKat Studio
Sweet Shop Lulu


10 Comments on “Food Photography 101: Props and Styling”
Great post! I love buying props for my blog and like you I try to stay away from busy patterns. I’m still working on food styling, especially since I have a very tiny area to work in. Thank you for all of your photography help! I can use as much help as I can get! I’m learning a lot.
This is a great post. I have way too many props (if there is such a thing) but I don’t utilize them nearly as much as I should. And the styling. I have a hard time with this too and normally give up because time is tight. Your post brings to light how important those things are in photography.
The little things make SUCH a difference! Love the tip on using small cups and bowls to frame the shot better.
awesome post. I love buying props at flea markets .. the combination of good finds and cheap prices make for even more awesome fotos!
Great idea to look at flea markets!
I really enjoyed reading your post! Styling is hard for me most of the time. I am so tired from cooking that I just want to take the photo and be done already. I have bought so many “props”, bowls and plates that my husband had to make 3 large pantry cabinets to house all of it… yes… I am crazy and an obsessive bargain shopper. LOL!
I also find great deals at TJMaxx and Burlington Coat Factory housewares sections. I can get plates and bowls for $1 sometimes.
Keep this series up… I love learning from you. :)
Just got done reading your photography series …. so awesome, insightful and helpful! Can’t wait to get home and practice some of these tips and tricks :) Thanks for doing this!
I think you might want to re-research the rule of thirds. It’s my understanding that it’s not the center square that should contain items of interest, but rather one or more of the four intersections produced by the divisions…
This is really attentiongrabbing, You’re a very professional blogger. I have joined your rss feed and sit up for in search of extra of your fantastic post. Also, I have shared your site in my social networks! efkgdggdkd
Awesome tips! Delicious looking photos. I am a total noob with food photography, or photography in general and posts like these really help! Thanks. I have a number of different props I can use (I find them rummaging through my home or buy them) but as a newbie, it’s a challenge to figure out what goes with what!!